3.3.4. Licensing Dialogs
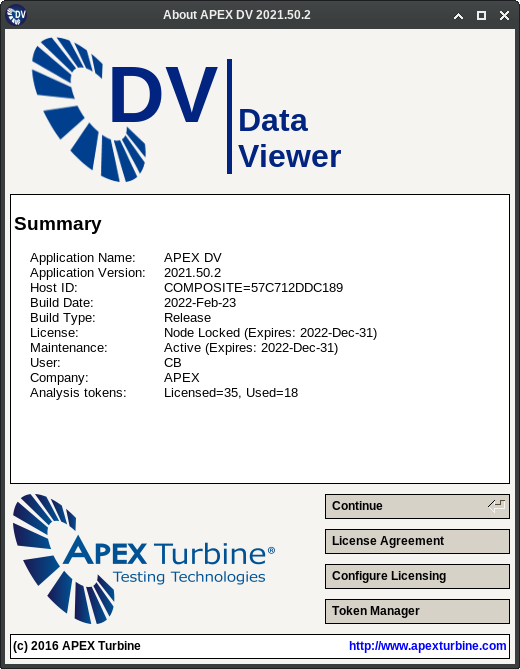
When launched, one of the first initialization steps the APEX DV application performs is the display of the Splash Dialog window shown below. This Window will automatically disappear after a short timeout, or it can be forced to close even earlier than that (assuming there are no issues with the licensing of the application).
The Splash Dialog will display a summary of the application’s version, build and licensing information. If necessary, all other licensing related dialogs are reachable from here. Finally, the splash window can be displayed at any time by selecting the ‘About’ entry under the ‘Help’ menu.
3.3.4.1. License Configuration
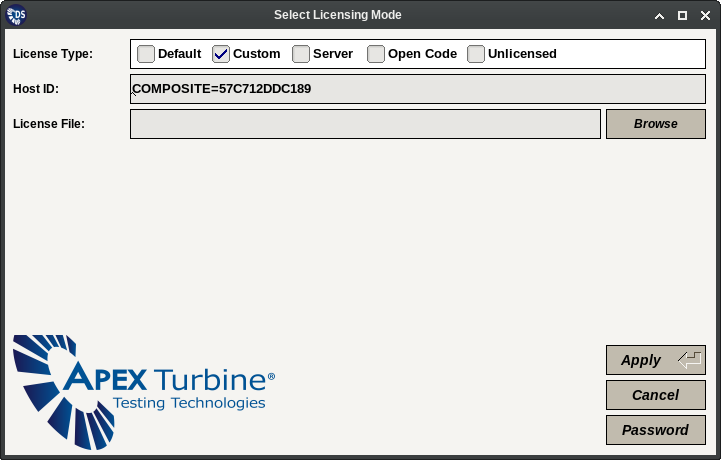
The License Configuration dialog can be accessed from the Splash Dialog window. This dialog allows the user to configure the mode used for licensing application and any necessary mode specific options.
Administrators may decide to protect the licensing configuration using a password. In this case the stored password must be entered before any changes can be made on this window. The text fields necessary for the entry, configuration or removal of the stored password can all be accessed via the ‘Password’ button on the interface.
This dialog allows configuring the software to run in ‘Unlicensed’ mode. For most APEX DS suite applications this will still allows users to execute them, but with reduced functionality. Mode specific information relevant to the other “real” licensing modes will be presented in the following sections.
3.3.4.1.1. Node Locked Licensing
In this mode the APEX DV application is licensed using an APEX provided Flexera FlexNET format license file. The steps to obtain such a license file are as follows:
- Install the software if not already installed.
- Run the software. From the initial splash screen invoke the license configuration dialog.
- Record the Host ID from the registration window and provide it to APEX, Inc.
- APEX will return a license file (.lic extension). Install the license file according to the method selected on the license configuration panel (shown below).
Node locked license files can be installed using one of the following two methods:
Default: In this mode the file most be copied to the ‘../licenses’ directory relative to the location of the main application executable file. Generally, only a single license file should be kept in this directory. When updating licenses remove the previous, expired files.
Custom: In this mode the file can be copied to an arbitrary location under the host OS file system, Its location will have to be entered on the license configuration dialog.
Note
The two methods described above may give different results in case multiple users are using the software. For this case the “Default” methods may work better, When using the ‘Custom’ method, select a directory that is accessible for all intended users.
3.3.4.1.2. Server Based Licensing
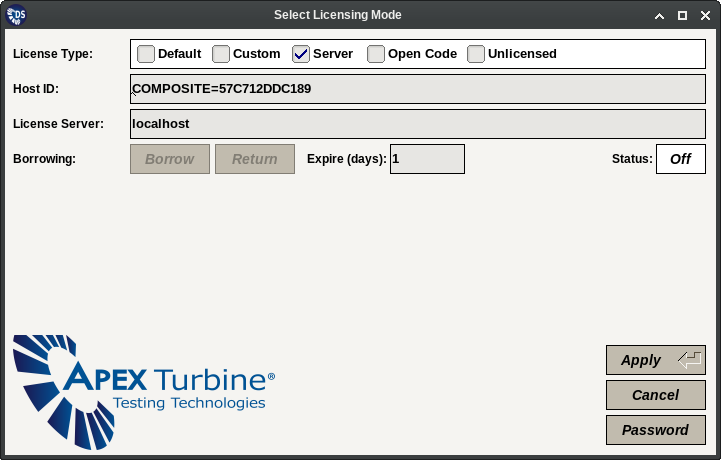
When using server based licensing nothing needs to be configured or installed on the client machine(s) running the APEX software. The management of the license server host is beyond the scope of this Manual. To configure server based licensing only the server’s IP address or host name needs to be entered on the configuration dialog page shown below.
APEX DS suite applications support borrowing licenses from the configured servers. Borrowed licenses are essentially node locked licenses (license files) created against the server’s authorized license counts. They can have a (Flexera imposed) life time of up to one year. During this time interval borrowed licenses allow running the application with the host computer disconnected from the server’s network. After reconnecting the host the borrowed licenses can also be returned early before their expiration date.
Note
Always configure the APEX application the way it is intended to be used while disconnected. Perform the borrow operation only after this has been done. This ensures that the borrowing host has the necessary license counts.
3.3.4.1.3. OpenCode Licensing
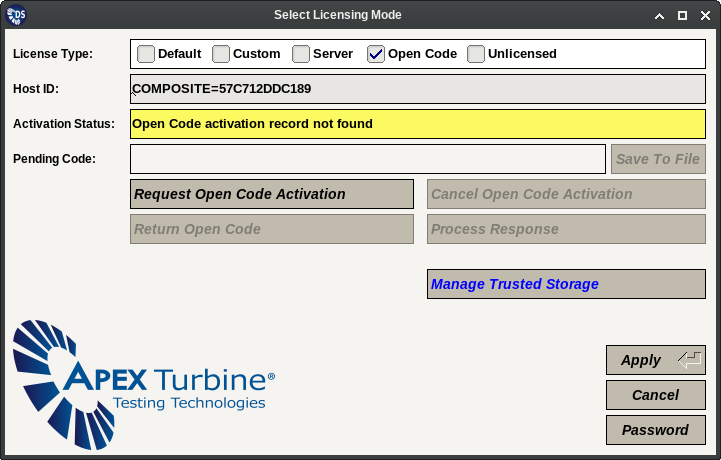
The OpenCode mode is a form of node locked licensing. The major difference is that instead of license files it uses alphanumeric code groups (6..10 groups of six character codes) to perform all license request, activation, deactivation and removal operations. OpenCode is based on Flexera’s ‘Trusted Storage’ technology that allows the verified installation and removal of application licenses. OpenCode licensing is configured on the dialog window page shown below.
APEX, Inc. maintains an OpenCode activation server that can be used to perform all operations listed below without support. The following operations are supported:
- Request Open Code Activation: Creates a new activation request. The displayed code must be entered on the activation server. This will generate a ‘pending request’ on the requesting host.
- Process Response: This allows processing a pending activation request after entering the activation server generated response code. This step completes the license activation sequence.
- Cancel Open Code Activation: This allows removing a pending request without completing the transaction on the activation server.
- Return Open Code: This will deactivate the license(s) owned by the APEX DV application and generate a code using which the “credit” for them cam be reclaimed on the APEX activation server.
The ‘Manage Trusted Storage’ button will switch the dialog page to a different mode where the available choices are for various (sometimes risky!) operations on the ‘Trusted Storage’ contents.
- Install Trusted Storage: Install the FlexNET software components on the target host. This has to be done only once.
- Trusted Storage Contents: Lists all stored licenses for all OpenCode licensed APEX applications.
- Reset Trusted Storage: Removes all stored licenses for all OpenCode licensed APEX applications.
- Remove Open Code: Removes a license without a return transaction.
Warning
Except for the Trusted Storage installation (when needed and only once) and listing operations do not use the actions on this page without being explicitly instructed to do so by APEX support.
3.3.4.2. License Agreement
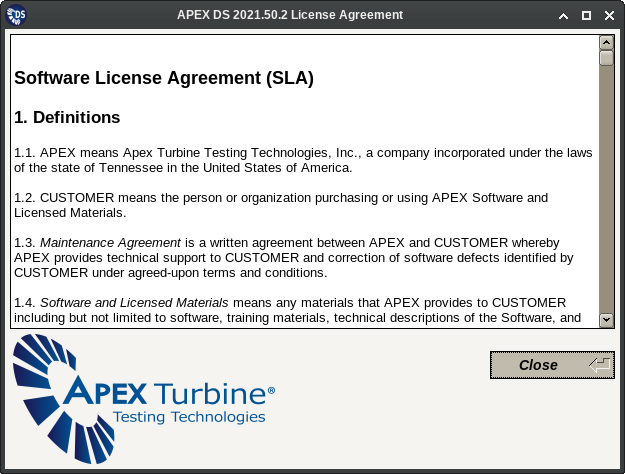
The License Agreement dialog is displayed every time a new software release is first executed. It can also be displayed manually from the Splash Dialog window. The text shown on this dialog is the APEX license agreement as applicable to the APEX DV software. Users must accept the text of the agreement to continue using the application.
3.3.4.3. Token Manager
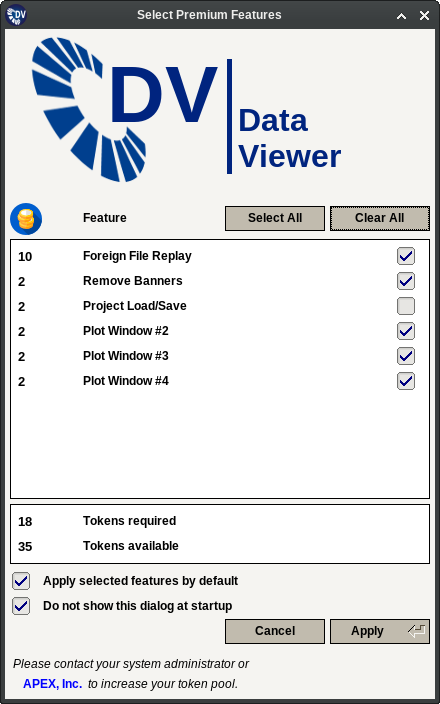
The optional premium features of the APEX DC application can be selected on the Token Manage dialog shown below. All these optional features are enabled by using APEX ‘Analysis’ tokens that can be shared between multiple APEX applications.
The Token Manager dialog allows the user to enable or disable optional APEX DV features. It also lists their token ‘costs’ and indicates whether they are currently enabled or disabled. Selections can be made either for the current session only or for all future invocations of the APEX DV application.
